Integrations
Connecting with Shopify
Learn how you can connect your Shopify shop with eWarehousing.
Step 1. Install the eWarehousing App in Shopify
Visit the Shopify App store and search for "eWarehousing". Select the eWarehousing app and choose "Add app"
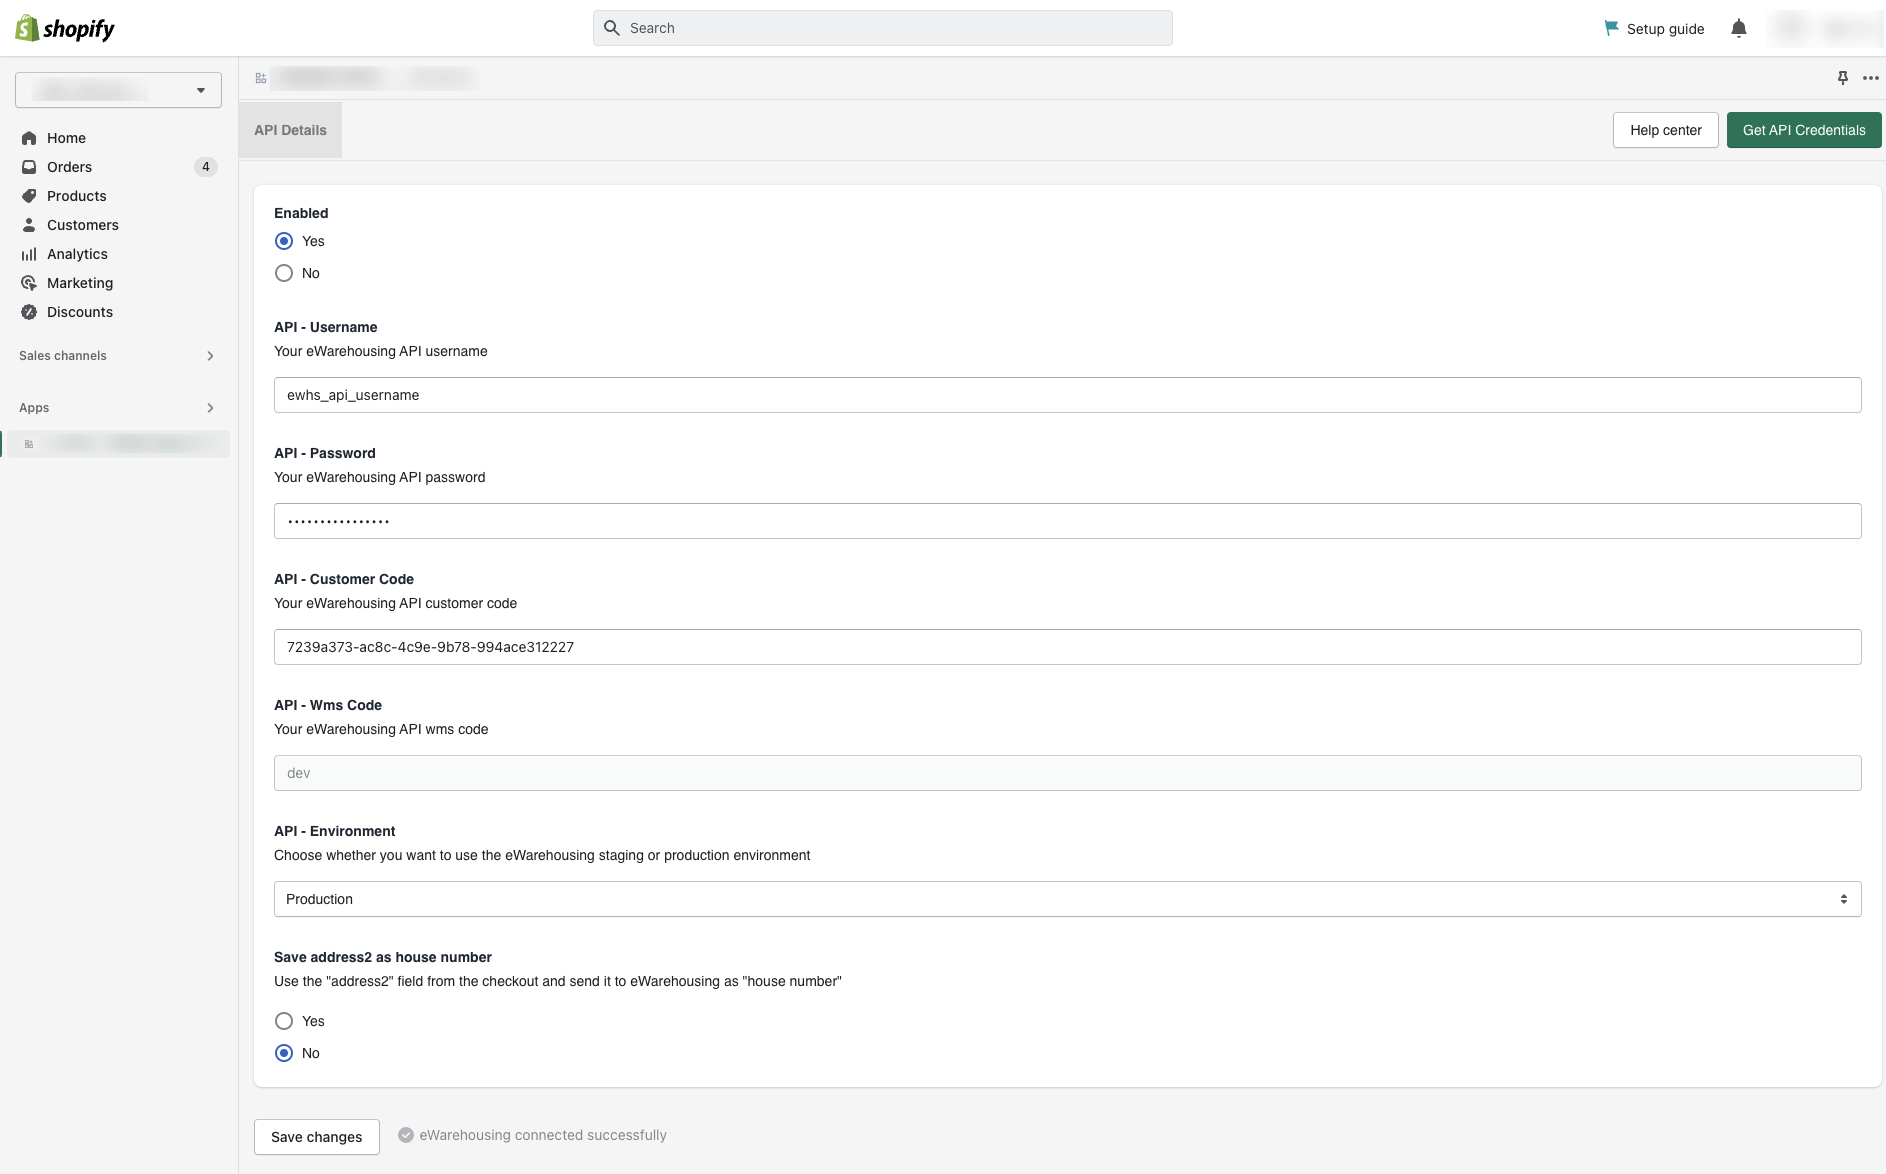
Step 2. Configure your credentials
After installing the app you will be redirected to your Shopify Backoffice.
| Field | Description |
|---|---|
| Enabled | Determines if the app is enabled yes/no |
| API username | Your API username |
| API password | Your API password |
| API Customer code | Your API customer code |
| API Wms code | The WMS code (automatically filled) |
| API Environment | The used environment. Production is the live WMS |
| Save address2 as house number | If enabled the "address2" field in Shopify checkout will be used as house umber |
Step 3. Test your credentials
After saving your changes the app will automatically test if the integration is set up correctly.
If all credentials are filled in correctly you will see the following message: 
Connection failed?
If the connection fails an error is shown. Most likely the wrong credentials are used or the wrong environment is selected.
Next steps
After installing the app we will automatically start processing orders and stock for products which are assigned to the eWarehousing location.
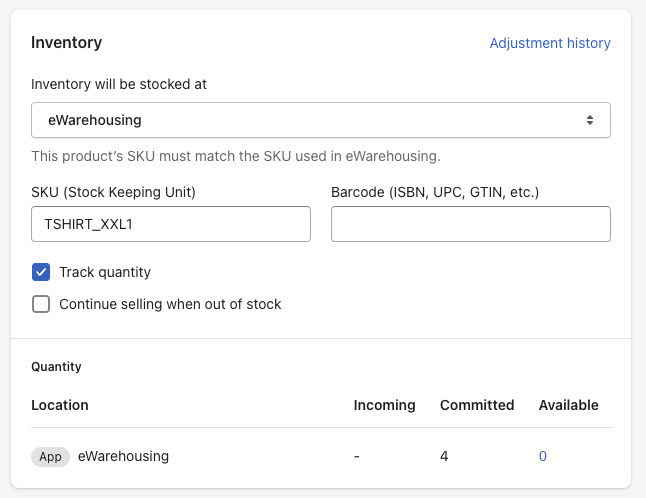
Assign products to eWarehousing
A product can be assigned via the product page in the backoffice. To assign a product to eWarehousing you have to select us under the "Inventory will be stocked at" option. The app will make sure the inventory is adjusted accordingly when the stock level of this product changes in our warehouse.
Example video:
Send fulfillment requests to eWarehousing
An order fulfillment can be requested automatically or manual.
Manual:
Automatically: